SHIPLAP!!!!
We have an obsession with it, don’t we? We all seem to want to have a little shiplap in our corner of the world. Me too! It is so pretty & adds such great interest to a wall. What’s not to like? Well…it is a commitment. If you go shiplap, you can’t just go back. There is going to be damage to your wall, you just can’t easily remove if at some point you do not like it anymore. It’s not just changing the color of paint on the wall.
When I moved into our house about 3 years ago…I started out having massive plans to shiplap half the house…well, maybe that is an exaggeration, but only slightly, haha! My husband talked me off the ledge and reigned me in on that one. One thing I did to incorporate an accent of the look of shiplap was to create a large FRAMED SHIPLAP wall hanging that goes over the back of our couch. This worked out great, as we have a two story open family room. A larger scale piece works great in this space and it gives me a little look of shiplap in my decor. But, as we often do when it comes to shiplap….I WANTED MORE!!!

Time went by….we made updates to our kitchen which you can get all the details on here:
———-> UPDATE A KITCHEN W/ OAK CABINETS WITHOUT PAINTING THEM
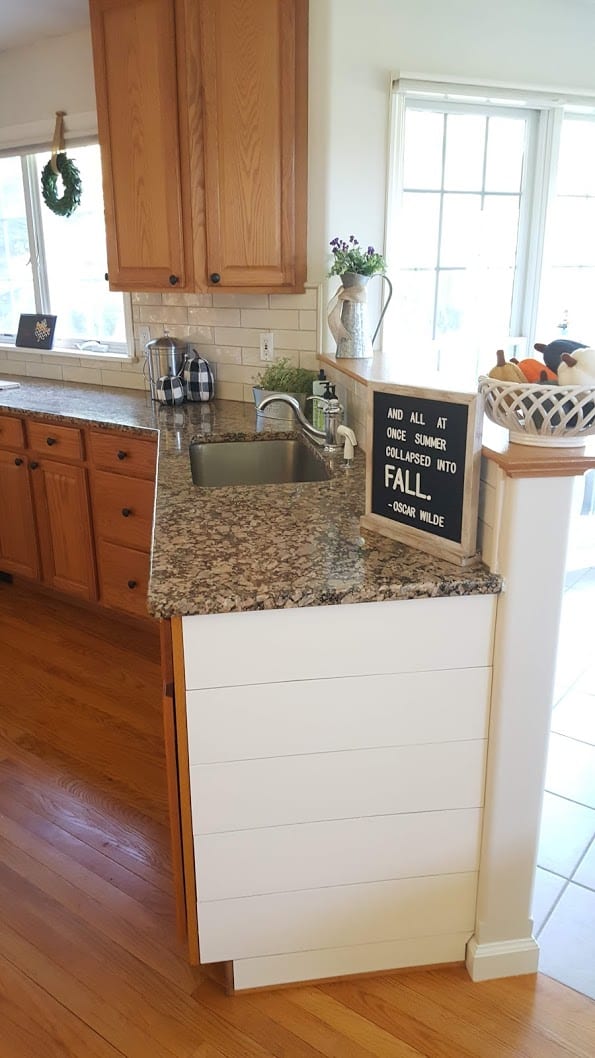
BEFORE:


I was really happy with how things turned out with the updates we chose to do in the kitchen. More time went by and we worked on some other projects. I still loved shiplap, but I really didn’t have a place that I thought I would want to do it. Then one day….the idea came to me:
What if I could have shiplap without having to commit to keeping it forever???
I know there are things like removable wallpaper with a shiplap design out there now, but that wasn’t something I was interested in trying at the time. I was looking for a way to have wood boards used to create shiplap, but without making holes in the wall or using glue that could damage drywall. Then, as I was reviewing my BLOG POST ON UPDATING OUR KITCHEN one day I saw a pic that I shared a link to in my post from fellow blogger In Between Chaos that showed the exposed side of her kitchen cabinets that she covered in shiplap.
And, then it all clicked. I knew what I wanted to do to complete my kitchen. (I thought it was complete before…but, you know…there’s always one more project that you come up with, right?! It’s not just me, is it?!)

I wanted to add shiplap to the exposed end of my kitchen cabinets, but I did not want to have to put nails or glue on my cabinets. I see shiplap as a trend in most cases, and I did not want to make a permanent change to my cabinets. So here’s what I did….I hope you try it, too!!
HOW TO INSTALL REMOVABLE SHIPLAP:
MATERIALS:
- 2 ft x 4 ft lauan plywood – See our HOW TO PICK LUMBER THAT DOESN’T WARP to learn more about picking out wood for your DIY projects.

-
- COMMAND PICTURE HANGING STRIPS – You will need 2 per board for the length of boards for this type of project. You will also want some extra to use in the center of at least some of the boards to help control any bowing of the board. I used both the 12 lb and the 16 lb strips for this project, both work fine. I may recommend the 16 lb strips for more adhesion surface.
- KILZ 2 PRIMER – 1 quart – This is a great product we use for so many projects, always want to have a can on hand!
- JAPANESE PULL SAW – These saws are great for so many DIY projects! It is what we used to cut our boards. If you have a table saw, that would also work great (and faster), but we always like to do as much as we can with hand tools to show what is possible to do without expensive equipment.
- 80 GRIT SANDPAPER
- PAINT- Choose your topcoat color.
LET’S GET STARTED:
- Measure the area you want to shiplap. This method will work best for smaller accent areas where you only need 1 board lengthwise, as it will be harder to get a smooth finish and match board edges if you try to do a wider area. This works great for adding a shiplap accent in your kitchen or a bathroom on an exposed cabinet. This could also be a good option to try in a narrow wall behind a toilet in a bathroom. Be sure to let me know where you try it! Our boards needed to be 23 inches long. We did 6 inch wide boards. Our bottom board was narrower than 6 inches and we used a nickel to space out our boards. We did not make an exact measurement when cutting the last board to the correct width, we just knew to cut it a little narrower than the actual measurement to allow for the spacing of the boards. Basically, you need to figure that each gap will be about 1/16″ (2 mm), which is the thickness of a nickel. So, we left about 3/8″ extra width since we would give us a little more room to work with in case there were any deviations in boards.

2. Cut the boards.
- If you have a table saw handy, that would be the fastest way to cut your boards, but you can also do this by hand.
- We used a JAPANESE PULL SAW to cut ours. It takes a little longer, but it’s super handy to be able to do projects like this around the house without needing to buy expensive power tools. Or, perhaps, you aren’t comfortable using them, no worries, you can do it by hand!
For ripping the shiplap boards by hand
- First, measure the width of the boards you want, erring on the high side. You can always sand or use a hand plane to remove material to get it to the right dimension. But make two marks, one on each end at the width of the board. Then use a straightedge to draw a line down the board.
- Clamp the board to a work surface so it doesn’t move
- Saw along the line, going slow and blowing dust away as you progress down the board. Tip – I used a small spring clamp to hold the two halves together to reduce chatter/movement. This really helps keeping to the line while sawing.
- Repeat this above steps of cutting the board to length. I used a bench vise to do this.
- Use sandpaper and sand along the edge of the sawed edge, moving away from the board to eliminate splinters / fragments. This just helps you clean up the edge a bit before painting.
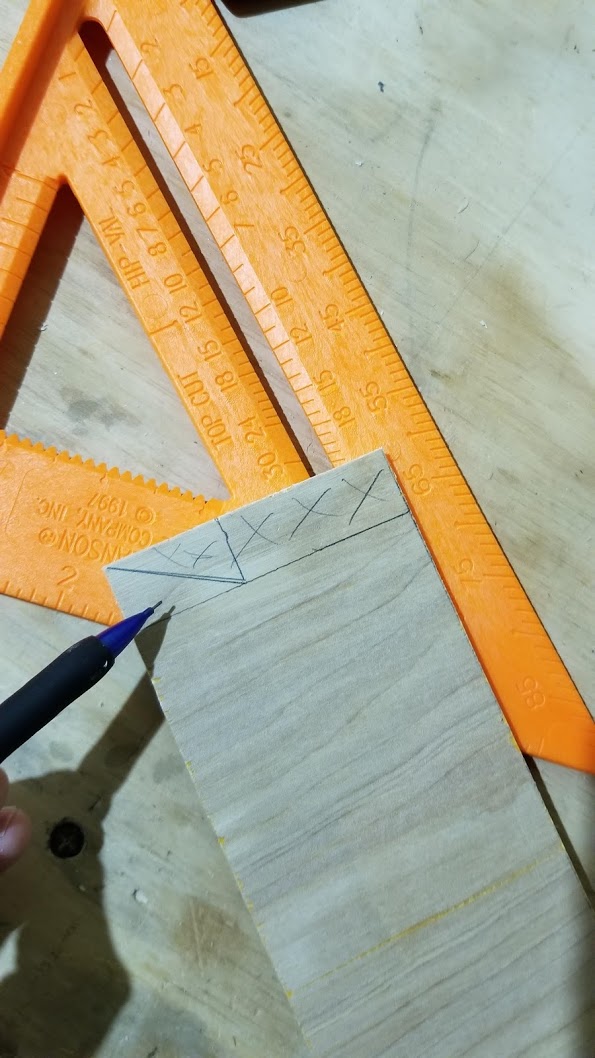
- For the final, smaller board, take careful measurements of the dimensions. It helps to have a set of calipers or combination square to aid you in getting accurate measurements. Then, using a bench vise or just clamping to a sawhorse carefully cut out the notch (if you have one).
- Check all pieces with a straight edge and square. Use sandpaper or bench planes to true up the boards or adjust final dimensions as necessary.


3. Sand the edges of the boards.
- Lightly sand the edges of the cut boards to remove splinters and fragments. You want to use something around an 80 GRIT SANDPAPER.
- When done wipe it down with a cloth to remove remaining dust in preparation to paint the boards.

4. Paint the boards.
- Before you paint the boards, lay them out and look for any warping in them. For best results, lay the board so that the warping of it creates a “u” and not an “n” on the floor or table where you are going to paint them.
- Start with a good primer like KILZ 2 SEALER & PRIMER. I did 2 coats of the primer on my boards and the only needed one coat of the topcoat paint.
- The most popular color to use for shiplap currently is Sherwin-Williams Alabaster. I had planned to use that to paint a large piece of furniture in the adjacent room previously and quickly learned that it did not work with the natural lighting in our home. It looked very stark and bright white, so I needed to find a more warm white and found that Sherwin-Williams Dover White works beautifully in this area of our home. It reads as a white, but as a soft finished look, rather than a harsh and cold look. Now, please keep in mind Dover White does have yellow tone to it, so in your lighting it may not work. I recommend trying a few white samples to see how they read in your lighting and at different times during the day, as well.
- For more detail on painting, check out my HOW TO REPAINT FURNITURE post.


5. Attach the COMMAND STRIPS to the backs of the boards.
- Take two strips and secure them together.
- Put one strip on each side (left and right) of each board and attach it to the board by removing the adhesive strips. I put them about one to two inches from the edge of the board.

6. Attach the boards to your cabinet or wall surface.
- Start with the board at the top and hold it an an angle so the adhesive does not attach to the the cabinet or wall surface before you have it in the spot you want it.
- Adjust the board to where you want it to attach and then press it to the cabinet/wall.
- Do not panic if you attach a board then realize it is a little off from where you want it. Simply remove the board from the cabinet/wall by pulling at an angle to release the Command Strips from each other. Then, readjust where you want it and secure it again.
- To do the remaining boards, as I held the board at an angle to get the board in the spot I wanted it to be, I also lined up a nickel in between to get the amount of space I wanted between the boards.


TROUBLESHOOTING:
- If you get the boards up and notice some boards are bowing and don’t line up the way you want, add another Command Strip behind the board that is bowing outward to bring it back closer to the wall. This should help it better line up with an adjacent board.
- Another idea to try is if you have a board that is noticeably bowed inward compared to an adjacent board, attach some FELT PADS on the back of the board. You can stack the pads on top of each other to the desired width to bring the board out as needed.
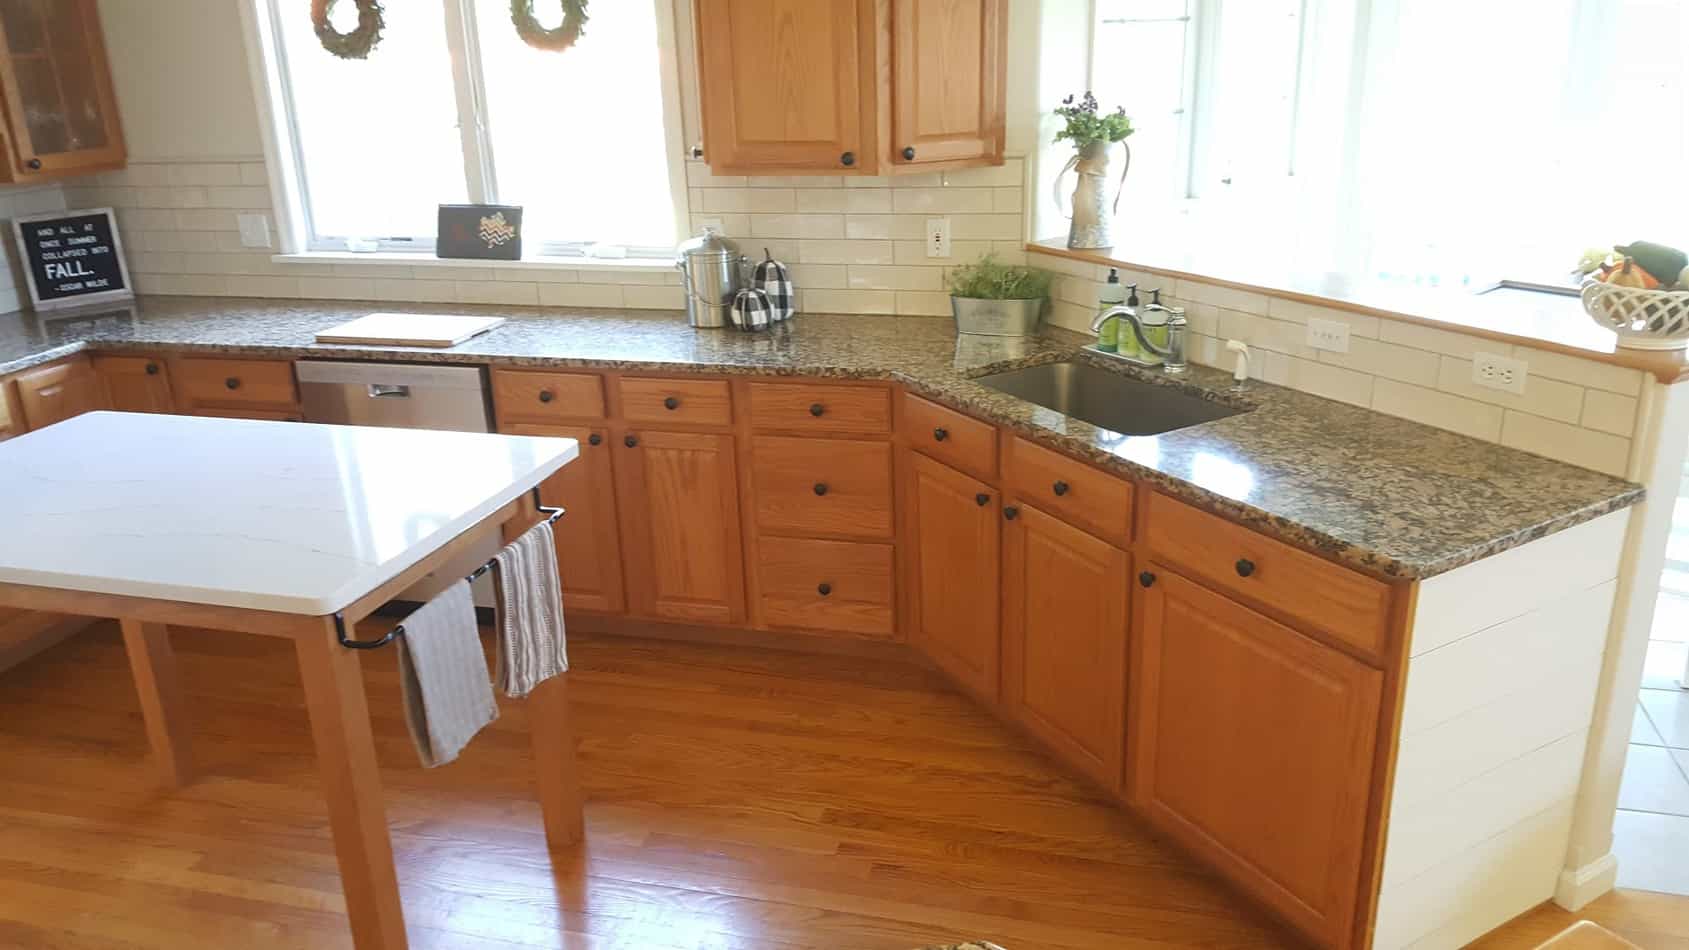
That is it!! How easy & awesome is this!?! I just love how it turned out…exactly as I envisioned!!
Now you can have all the SHIPLAP YOU WANT WITHOUT ANY LONG-TERM COMMITMENT!!
DON’T FORGET TO PIN IT:


You may also enjoy:
MODERN FARMHOUSE LIVING ROOM TOUR
FREE PLANS – DIY Rustic Farmhouse Stained Board Sign
7 Ways to Update a Kitchen w/out Painting Oak Cabinets
How to Make the Perfect Farmhouse Bow
Please take a moment & subscribe to our YouTube Channel:
GROWIT BUILDIT YOUTUBE CHANNEL
This articles contains affiliate links for Amazon. This means when you click and shop through a link on my site it lets Amazon know I referred you and I may earn a small commission at no cost to you. Thank you for supporting our website by shopping through our links
Recent Posts
New Jersey Tea is a flowering shrub native to eastern North America. Scientifically known as Ceanothus americanus, it grows 3-4' tall by several feet wide in full sun and well-draining soil[1][2]. ...
One of the more common weedy grass species one may encounter in North America is commonly known as Foxtail Grass. Foxtail grass is a common name that is used for several species of grasses of the...