When one is hiking or driving and you notice some interesting or beautiful flowers, you may think that they would make a great addition to your garden. Although it may be tempted to dig up the plant or come back to harvest some seed, you should ask yourself a few questions before proceeding. Namely, is it allowed for you to harvest? Is the plant endangered or threatened? And then, what is the best way to propagate this plant? I will explain all of this to you in this article, as I have foraged/harvested native seeds for years.

Legalities
So, you saw some pretty flower along a road or in the woods and you would like to grow it yourself? You can certainly do that (I mean really, you physically could), although you may be breaking the law. So, let’s consider this further in this article. I’ll cover some of the aspects you should consider to harvest seeds or plants from the wild ethically, and sustainably.
In general, it is illegal to take seeds or plants from the wild. There are exceptions though, for instance in my state of Pennsylvania you are allowed to forage fruits on certain state parks (like Pawpaws or raspberries). And in our State Game Lands you are allowed to take any berry or mushroom for your own personal use. So, search out any rules/regulations for where you are going. If on private land, without permission it is a form of theft, and could not be done without the permission of the landowner. You are responsible for determining if collecting is legal.
When it comes to seeds, it is generally ok to take from roadsides provided you follow the 10/10 guideline, there must be at least 10 of a plant and you take less than 10% of the seed. The 10/10 guideline helps ensure you are leaving seed for birds/rodents to eat, and also to help sustain the population.
Ethics
There are a few ethical considerations to foraging native seeds. First, these seeds aren’t just for the propagation of the plant, but also serve as food for wildlife. So, overharvesting doesn’t just impact the plants ability to sustain and spread it’s range, taking too much seed can be harmful to winter survival of birds and animals. Second, some plants are endangered or threatened, and you should not take these seeds. And third, don’t overharvest. You don’t need to gather thousands of seeds to grow a few plants for your garden. One or two seed heads is often enough, as just about all fresh seeds foraged will have high germination rates.
So, keep the below points in mind before you venture out to harvest seed:
- Make sure collecting is allowed or get permission
- Roadside ditches are fine for collecting in most cases
- Do not collect rare/endangered species. You need to research this. See here.
- The 10/10 rule – only collect if there are 10 plants and take 10% of the seed heads or less
- Better yet, determine how many of the plants you need, and collect based on that…you probably don’t even need 1%
- Your mindset should set this as the default position, as annuals require seed crops to perpetuate themselves
- One milkweed seed pod is more than enough to grow dozens to hundreds of plants!
- There is less risk to a population if you collect from long-lived perennials
- Better yet, determine how many of the plants you need, and collect based on that…you probably don’t even need 1%
Transplanting is often fatal to the plant!
Don’t dig up and move wild plants. This is one that many people are unaware of, but digging up plants that are blooming or producing seed often results in the death of the plant. I am speaking to you from experience here, in that I’ve transplanted blooming Echinacea around a yard before, and it survived but not without a ton of effort from myself in the form of several gallons of water each day. Even still, when you transplant or relocate a plant, there are certain ways to do it that will increase the likelihood of it surviving. And finally, unless this plant is on private land and you have the owners permission, it is probably illegal to transplant. So, unless you are experienced in this, it is better to leave the plant and just get seed. Oh, and some plants just don’t transplant well at all!
Identify the plant
So, the first step to saving native seeds is to identify your plants. To do this, you can botanically key it out, or use a plant identification app to help get you close. Based on some testing I did a couple years ago, I recommend as my personal favorites Picturesthis, plant.net, and Seek. Seek is particularly conservative in it’s identifications, but still accurate (they made some big updates after my testing, and I haven’t gotten around to including them in the results).

Don’t harvest seed from endangered plants
Make sure the plant is not endangered or threatened. So, check the conservation status. If it is endangered or threatened, do not collect. Here is a Federal listing for rare/endangered plants. Also, your state will likely have their own list, so search it out. For example, here is lists for Pennsylvania and Maryland.
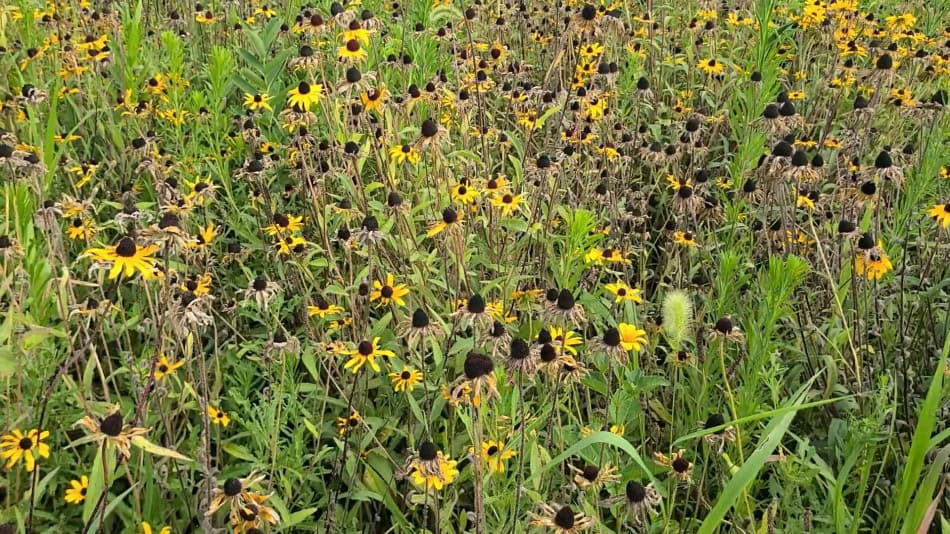
If the plant is an annual, biennial, or short-lived perennial, you should carefully consider the population size before you collect seed. So, assess the population. Are there numerous plants there, or is it an isolated specimen? If an isolated specimen you may wish to leave the seed. If it is a single specimen that is a long-lived perennial or a shorter lived plant with 50+ seed heads (like Brown Eyed Susan), then it is and take a couple seed heads.
The thing about assessing the situation is this – forests, meadows, and even ditches are not static. Plants die out every year as different successional plants take hold. Early colonizing plants would be shorter annuals and perennials, as well as short-lived perennials or biennials like Black-Eyed Susan or Brown-Eyed Susans. Initially their numbers are large, but eventually their numbers will change. And as short-lived plants die, new plants crowed in or sprout up (often invasive speeches).
Tools
There are a number of tools that can help you collect seeds. I’ll list them out below, and how I use them.
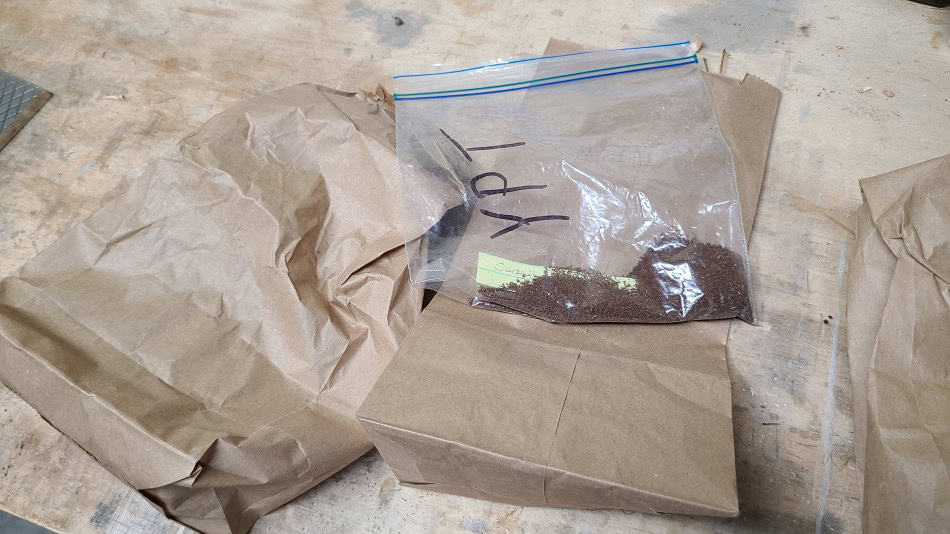
Containers / bags / baggies
You can’t forage without having a way to hold the seed! Brown paper bags work great for holding seed heads, capsules, even with the stalk still attached. Being paper, they will breathe, helping to reduce the chances of mold or fungus. Ziplock baggies can work if you just have a small volume of seed heads or capsules, or berries. I use them for spicebush berries, raspberries, blackberries, etc. Just make sure you transfer the seed heads to a plate to dry overnight and remove any surface moisture. I’ll discuss more on this topic when discussing storage methods further down the article.
If you are trying to get large amounts of seed, say if you want to rewild an area or are just foraging large amounts of berries, I find a lunch-size cooler with a shoulder strap to be really nice. It allows you to free your hands and forage without hinderance.
Also, when it comes to storing seeds I generally use envelopes for small amounts, or used yogurt or coffee containers for large amounts of seed. Just wash/dry them and then they are ready for use.
Pruning shears

Pruning shears are an essential. Simply for snipping off seed heads and dropping them into your container. While it may be tempting to use regular scissors, you may find those inadequate on tougher stems like Echinacea. So, pruning shears are small enough to slip into your back pocket, but tough enough to cut through any flower stalk.
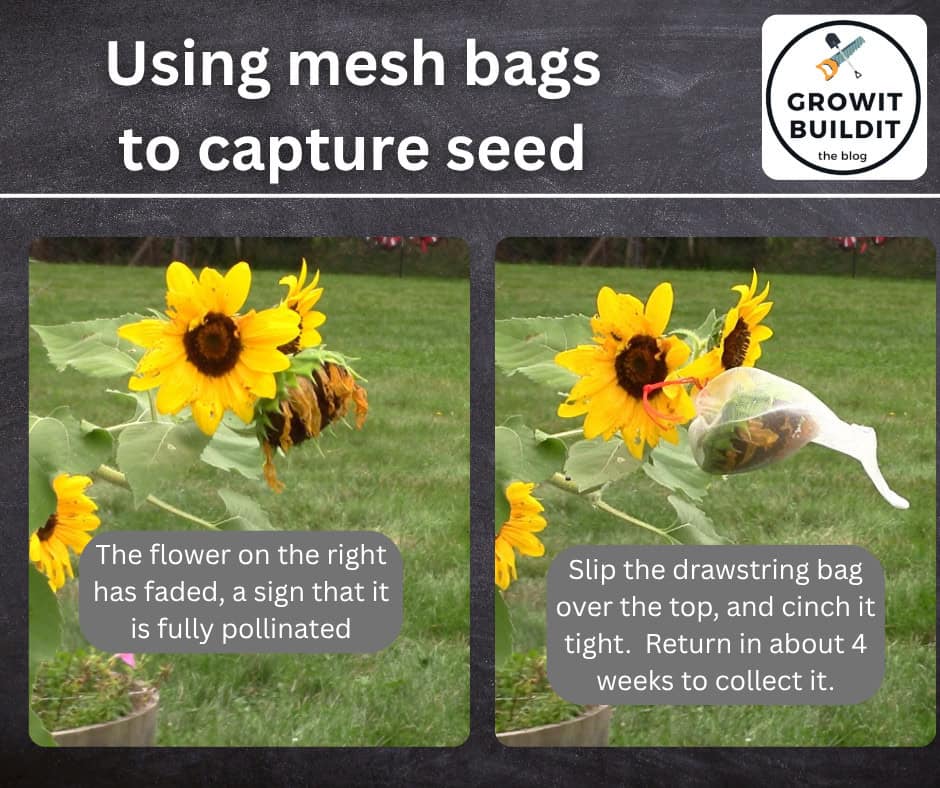
Mesh bags w/ drawstring

These bags are cheap – buy roughly 20-50 bags for <$10. You can slip these over seed heads right after the flower has faded (meaning it has been pollinated), and then just return 4-6 weeks later. The seed (assuming it doesn’t fall through the mesh) will still be on the head or captured in the bag. This works particularly well with perennial sunflowers. It will not work on large ‘mammoth giant’ sunflowers for obvious reasons.
Strainers, screens
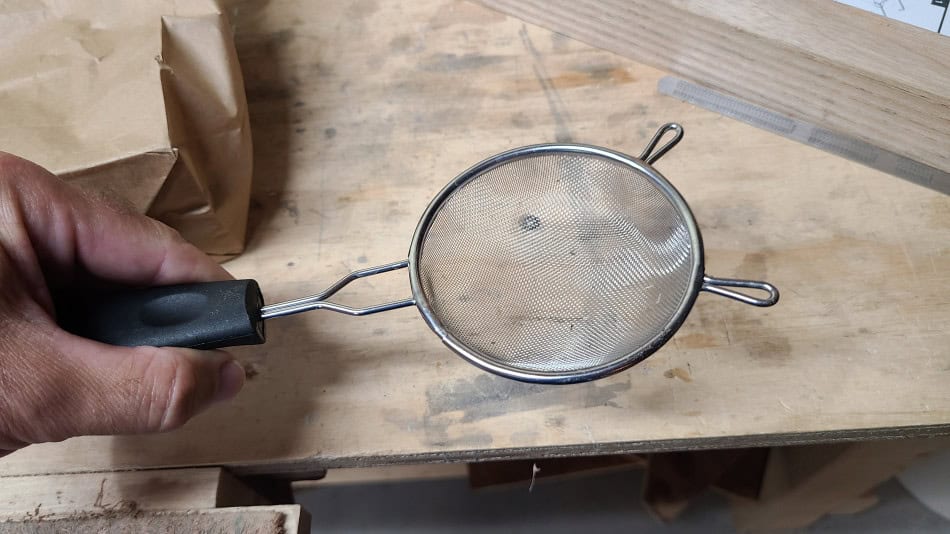
Common kitchen strainers will come in handy later for cleaning the chaff from the seed. Different sizes usually have different mesh sizes.
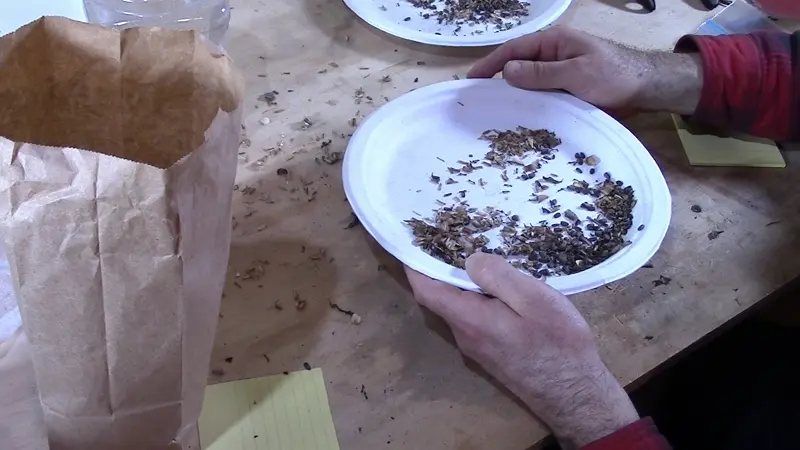
Regular or paper plates
I like using plates for separating seeds (use your driver’s license). And I use paper plates for cleaning seed. With paper plates, once you’ve cleaned the seed you can sort of fold the paper plate to dump the remainder into your envelope or bag.
Note pad / marker
You will want to be labeling all of your seed you harvest, with the date. Seed usually only lasts 1-4 years depending on the species. But, to be safe, plan on using your seed the same year you collect it.
Timing
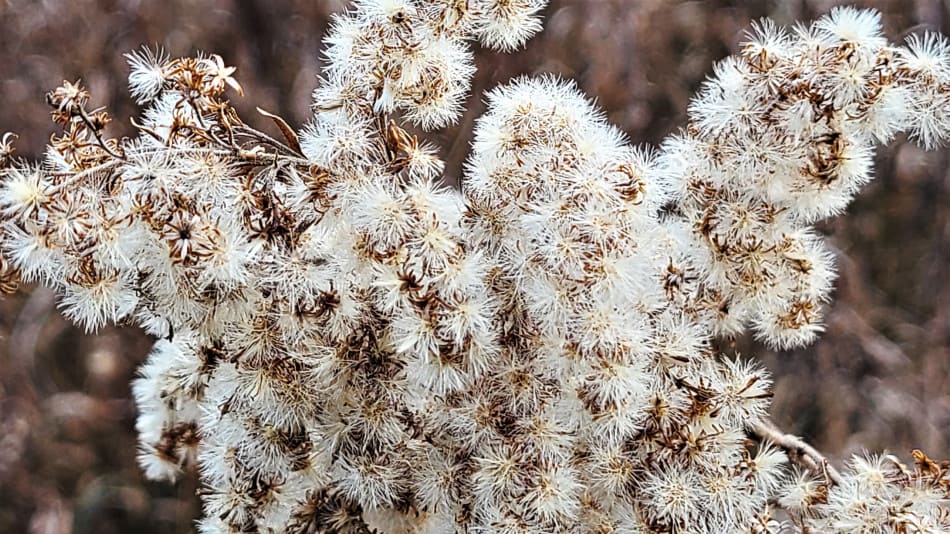
Plants produce seed in several different ways. Some produce capsules, others fruit, some make seed heads. Each of these will disperse their seed and propagate themselves in different ways, in a natural sense. Consider how this will occur for your plant. For example, Hickory trees rely on squirrels and chipmunks to bury the nuts, and that they won’t find them all, ensuring that some germinate into new trees in the Spring. Other plants like Lobelia will have capsules that burst from wind or drying ,and have their seed be spread somewhat by wind or floating away on water. Many flowers form seed heads that will have their seed dispersed by feathers attached to the seed (goldenrods) or from birds eating the seed and spreading later on when they pass them (Blacked Eyed Susan, Coneflower). You may need to consider how your plant will disperse it’s seed, and take steps to make sure you can get the seed before the animals do.
While animal and bird predation of seeds is common and natural, it is rare to require special timing on your part. For one thing, there exist methods or tools to help protect the seed from the birds, or from seed dispersing in the wind. For example, putting a twist tie around a mostly-developed milkweed seed pod will prevent it from opening and dispersing the seed. And when it comes to seed that happens to be a birds favorite food, like any sunflower, I find these mesh-drawstring bags to be incredibly helpful. You slip it over a seed head and pull the drawstring tight. No bird will be able to access the seeds, and you will usually get 20-50 seeds. I’ve even read of others using pantyhose to protect seed heads from dispersing.
When it comes to timing, for most plants, it takes at least four weeks after the plant has bloomed for the seed head to develop. So, return to your plant each week until it stops blooming, then plan on returning in a month. After that, come back every few days so you don’t miss the seed. In general seed capsules begin as green, turning to a yellow, white, or brown when ripe. At this point, many capsules will split open and disperse seed. Seed heads will be dry, black/brown. And for most seed heads, you can crush the seed head or shake it to have some seed fall onto your hand. Ripe seed will normally be brown, black, or a cream-white color.
Collection methods
To collect the seed, after it has ripened enough, go and get it. If there are a large number of seed heads available, you may wish to test a one to see how secure the seed holds in the capsule/head, if it will fall out if the seed head turns upside own (looking at you Monarda), and if it will explode if you touch it (Partridge Pea, Jewelweed).
If you are unsure, simply try cutting seed heads or capsules by cutting just below them on the stalk, and immediately placing them in a container or bag. Sometimes you can even hold a baggy open below a seed head and tap or shake it a bit to release some seed, leaving the rest (Monarda, Agastache, central disc flowers).
Releasing the seed
The seed may be held tightly within the seed head. If this is the case, you need to get it out of there. I’ve found the easiest way to do this with many species is to place the seed head into a plastic container with a lid, and vigorously shake it up. After 30 seconds you can dump the contents onto a plate. The gif below is from my article on saving Echinacea seeds.

If you have capsules, they will need to be opened. They may do so on their own by using the shaking method described above, or it may need manually opened/popped. For an extreme example, Penstemon seed capsules are usually tough to pinch open by hand. You can do it, but they are surprisingly tough on your fingers. An alternative method for something like this would be to use a rolling pin to aid in the opening of the capsules. Then, move the contents to a bag and shake it up to release the seed further.

Cleaning seed
Removing chaff
With most of these methods, you will often wind up with see mixed with chaff. This is where we can use paper plates combined with the kitchen strainers. So, depending on what you’ve collected, you may wish to remove the chaff from the seed.

This is where kitchen strainers or screens can really come in handy. If you have two paper plates, you can simply dump the seed/chaff into an appropriate sized kitchen strainer and let the seed or chaff fall through. You are then left with a more clean seed mixture. You may need to repeat this several times until it is cleaned until your liking.
I should note that it is not necessary to remove the chaff. And the degree to which one cleans the seed is totally up to you.
Using wind / blowing chaff away
Another method that works particularly well with heavier seeds is to simply use wind, or blow the chaff away yourself. I place the seed/chaff onto a paper plate, and then depending on wind conditions either take the mixture outdoors or blow it myself. If outdoors and the seed is heavier, you can pick up the mix and drop it from a small height above the plate, and the wind may remove all the chaff while the seed falls back to the plate. Alternatively you can carefully blow on the plate (see below) to remove the chaff. In the below clip I’m doing this to Wild Sunflower seed.
Seeds with feathers
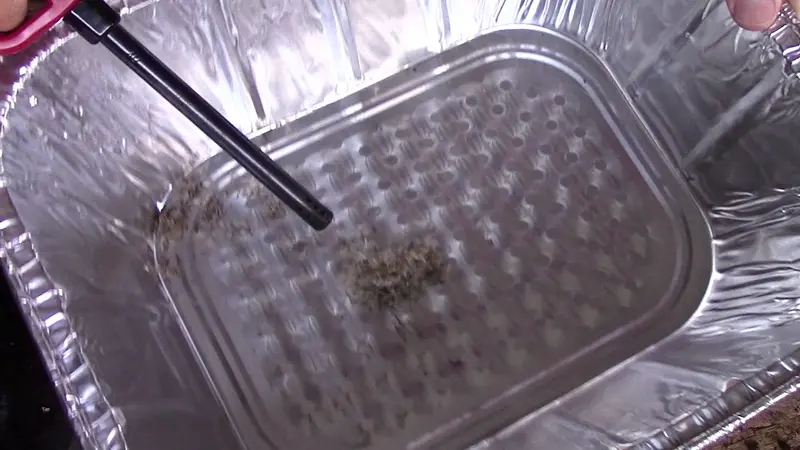
Some seed will come with a tuft of hair or feather attached to it. Professional seed companies have tumblers or winnowing machines that will separate the seed from the chaff. But, a home-gardener will typically not have access to one of these! In that case, let me be upfront and tell you that you do not need to remove the feather. The seed will germinate either way, but it can be a bit messier to sow it.
That being said, I have experimented by removing them by hand (pulling them), and even burning them. I burned them in a aluminum foil tray outdoors on a calm day. What I did, is that I smashed as much Showy Goldenrod seed together as I could, then used a lighter to burn off the feathers. It worked, somewhat. You needed to keep the lighter on and move it about the pile. Now in my little experiment it did no harm the seed and I was able to germinate it the following Spring via winter sowing. But, try this method at your own risk!
Storage
For most seeds, once they are dry you can store them in an envelope or zip-lock bag (if fully dry) in a cool, dark place for several years. And what is a cool dark place? Well, a drawer, closet, or a dry basement work great. The main thing to avoid is extreme heat or humidity.
For some species you should store them in a sealed container, in the refrigerator. This is to maintain their freshness, and some examples of seeds that benefit from this would be Virginia Bluebells, Phlox, Turtlehead. I also suspect that Ironweed, Culver’s Root, and Joe-Pye Weed seeds benefit from this too. Now, you can store all your seeds in the fridge in sealed containers provided they are free of surface moisture, and this will prolong their viability. I also recommend this method for any seed from a woody shrub or tree. These seeds are alive, and if they fully dry out they are no longer viable (acorns, walnuts, hickory nuts, spicebush…).
How long will my seeds last?
Soooooo how long will your seeds last? Well, it depends. Some seeds need to be used within a year, while others will remain viable for many years if kept dry and away from extreme temperatures or humidity. As a general rule, any seed from a vine or woody stem should be used the following Spring. After that their viability will begin dropping, while seeds from most flowers can last for 3-5 years without too much loss of viability (coreopsis, rudbeckia, echinacea).
But above all, it is safest to use them the following year. Any seed you don’t use can be tossed in a ditch by early Spring, and maybe you will spread around some more natives to compete will all our invasives!
Conclusion / Other resources
Saving your own native seed can be a fun and rewarding experience, but it should be done legally and ethically. Do not take seed from endangered or threatened plants, and only take what you need. I’ll compile some of my seed saving guides below. These are species specific, and contain methods I developed and have used for years. All of them work, and are easy to follow. Further below I’ll add some external resources if you would like some further reading.
- Save Coreopsis seed
- Liatris seed
- Save Penstemon / Beardtongue seed
- Bee Balm seed saving
- Black Eyed Susan Seed (all Rudbeckia sp.)
- Echinacea / Coneflower seed saving
- Milkweed seed saving
- Collect and germinate Black Cherry Seed
- Growing Eastern Red Cedar from seed
- Harvesting and growing Black Walnuts from seed
- Collect and germinate acorns
- Growing Pawpaws from seed
- Growing persimmon from seed
- Save seed from Eastern Redbud
Find more native gardening tips here!
External resources:
[1] – Seed Collection. North American Native Plant Society. 2017. Accessed 07AUG2025
[2] – Lenny Librizzi, How To Save Native Plant Seeds. Native Plant Society Of Staten Island. Accessed 07AUG2025. https://nativeplantsocietyofstatenisland.org/how-to-save-native-plant-seeds/
[3] – Eckberg, J, Hopwood, J, Lee-Mader, E. Collecting and Using Your Own Wildflower Seed. To Expand Pollinator Habitat on Farms. Xerces Society. 2016. Accessed 07AUG2025.
[4] – Collecting Native Seed. US Forest Service. Accessed 07AUG2025
Recent Posts
When it comes time to build a garden, most people are faced with the chore to remove the grass. And there are many methods that will work for doing so. But, as the title of this article questions,...
Green Milkweed is a herbaceous wildflower native to North America[1], and is a host plant for caterpillars of the Monarch Butterfly[2]. Scientifically known as Asclepias viridis, it grows up to...