
Got a flat wheelbarrow tire? You’ve come to the right place. I’ve repaired them multiple times. Whether you rolled it over a nail or the tube just became a bit worn, you can fix it and I will show you how. This is just one of those occasional gardening chores you’ll have to do in life.
I’m going to focus on two primary methods of repair, and you can do either one for less than $10. But the real value I’m going to show you is how to remove the tire from the rim, and more importantly, how to reattach it as that is usually the most frustrating step of the repair! But anyways, let’s dive into it….
Tools required
- Wrench
- You’ll need this for removing the wheel
- Large flat-head screwdriver
- You will need at least one, but two can be handy. Wrap the tips in duct tape to cover up any sharp edges.
- Air pump/compressor/bicycle pump
- You need this for diagnosing the leak, and just for airing up the tire
- Spray bottle with water
- This can be handy to find the leak
- A repair kit or new tube
- You will need a patch-kit for repairing the tube, or a new tube itself. But don’t buy yet – we’ll cover the options later in this article.
Step one – Remove the wheel

No matter what kind of wheelbarrow you have, you are pretty much going to need to remove the wheel. Some two-wheel dollies or lawncarts may not need this – namely if the wheel is attached to one side only. Otherwise though, you are pretty much forced to remove it. To do so, simply find the appropriate sized wrench, then loosen and remove the nuts from the mounting bracket. Then, slide the wheel, axle, and any bushings off. Set the wheel/tire on the ground where you’ll have a bit of space to work on it.
Step two – unseat the tire from the rim
Make sure the tire is completely flat, as that will make this job much easier. So, the vast majority of wheelbarrow tires consist of a hard outer tire and an innertube. And, it is the innertube that holds the air, and we need to get that out of the wheel.
So, first things first, insert the screwdriver between the tire and rim, pointing the tip to the outside diameter of the wheel. Have the tip extend under the tire by 1/2″-1″, then pry down on the handle, using the rim for leverage. This will pop a small portion of the tire over the lip of the rim.

Then, slide the screwdriver along the rim a small distance and repeat. More of the tire will pop over the rim. Keep doing this until the whole tire is over the lip of the rim. At some point you will have enough of the tire over the rim so that you can just man-handle the rest.
Step three – remove the tube
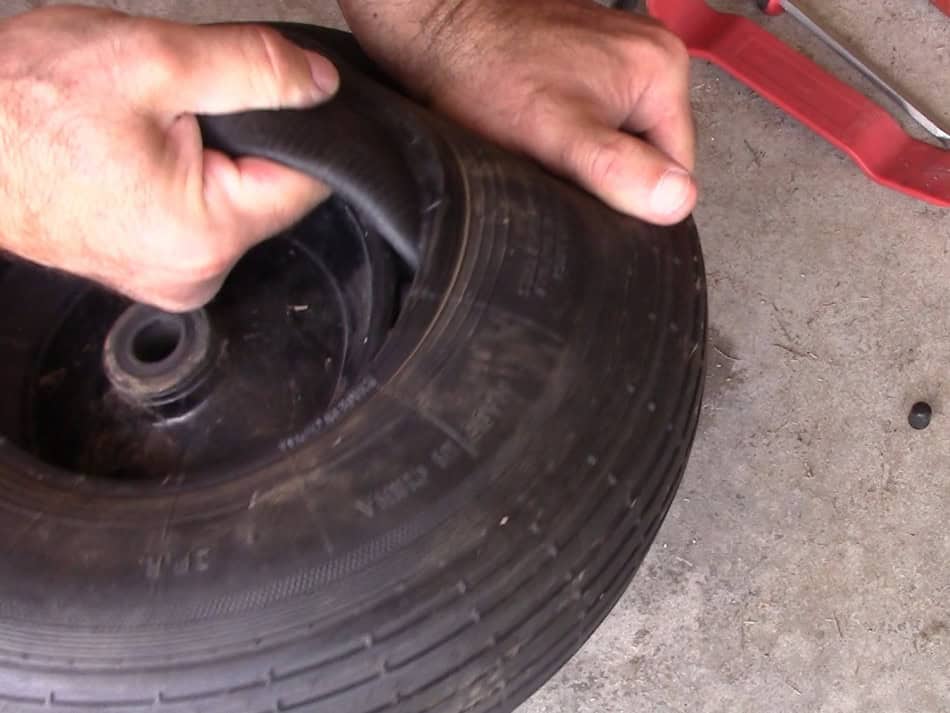
Reach your hand between the tire and rim and pull the tube out. Make sure you push the valve through the little hole in the rim first, as you don’t want to damage that in case you plan on just patching the tube.
Step four – inspect the tube and find the leak
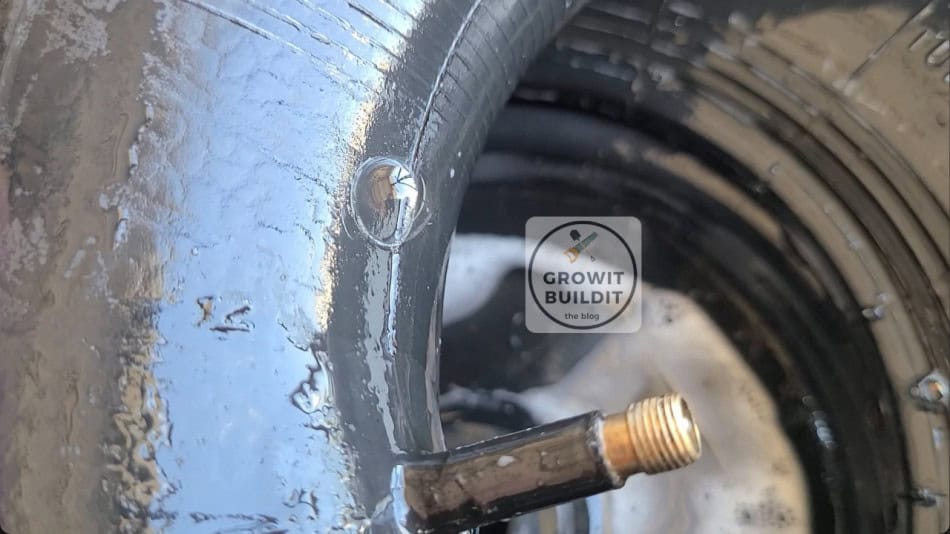
Using your bike pump air the tube up. Look and listen for the leak. Using a spray water bottle with a few drops of dish-soap inside, you can find the leak easily. It will bubble and whistle where the leak is.
Step five – repair or replace the tube
Take a look and carefully inspect the hole and note how large it is. Inspect the rest of the tube and try to determine if you think more holes or cracks may open up. If the tire is old, you may want to just replace the whole tube.
But ultimately, you are going to need to determine what is best for your situation – repair the tube with a patch kit, or replace with a new tube. If the tube is 5 years old, it is probably wise to just replace the entire tube with new. If you ran over a stiff thorn or small nail, then it will be cheaper to patch it. For reference, you can usually buy replacement tubes on Amazon for less than $10, or repair patch kits for about $3-$4. Just note though, repair-patch kits are not returnable through the mail.

If you opt to purchase a new tube, look at your old tube to see what size it is, and order an exact replacement. As you can see above, my tube was 3.50/4.00 – 6.
Using a repair patch kit
Using the repair patch-kit is very easy. Simply take the abrasive pad that comes with the kit and rub it over the leak. Do this to rough up the surface and remove any ridges or seams. This should take about 30 seconds or so.
After that, spread rubber cement around the hole, covering a larger area than the patch you will use. Your kit will have several different sized patches, and you need to use one that is larger than the hole.

Once you’ve spread the rubber cement, apply the patch. Wait for it to dry (usually an hour or so – check the directions). Then, air up your tire to validate that you’ve fixed it. If you have fixed it, deflate it again, and move to step six!
Step six – insert the tube into the rim
Now we need to shove the tube back in-between the tire and rim. Lay out the tube on top of the assembly, and make a gap between the tire/rim. Shove the tube into this, and work it around the outside of the rim. Push/pull the valve through the hole of the rim, and make sure it ‘wants’ to stay there (make sure the tube is oriented right).
Adding a few pumps of air can really help the tube stay seated in the rim better, although this is an option al step.
Step seven – re-seat the tire on the rim
Now it is time to put the new or newly-repaired tube into the rim. This is often considered the most difficult part of the job. But I will show you the easiest and least-frustrating way to do it.
Begin by laying the wheel on the floor in front of you. Push the rim away from you, holding the bottom tire near your knees. This creates a gap between the tire and rim, and you should be able to push a good chunk of the tire underneath the lip of the rim. I am usually able to do 30-40% in this way. Once you have done as much as you can, without it popping over, pull the tire/rim towards you and place your knee on the bottom of the assembly.

Now, take your flat-head screwdriver, and insert it between the tire and rim, with the tip pointing towards the center of the wheel. Push down on the handle over the tire, and a small amount of the tire should go beneath the rim. Slide the screwdriver a small amount further (1/2-1″), and repeat. Keep doing this, and you will make small incremental steps to reseating the tire. Once you have done about 70% of the tire under the lip of the rim, the remaining tire will just sort of pop over the rim, and voila – the tire is now seated.
Step eight – reinflate, and reinstall the tire
Simply air up your tire and give it a last listen for any leak. Then, reinstall the wheel to the wheelbarrow, and you should be done!

Video guide
If you’d like to see this live, I published this short video documenting the entire process as laid out in this article. It’s about four minutes long, so I hope you enjoy it.
Conclusion
Fixing a flat wheelbarrow tire is a simple, but rewarding activity that can save quite a bit of money. For less than $10, you should be able to repair 99% of all flat wheelbarrow tires. There are a couple other repair options such as expanding foam, fix-a-flat, and slime that you may see in your local hardware store. I didn’t use any of these as I consider them to be either less reliable, messier, or more expensive. Nonetheless, you are always free to venture down one of those paths should you choose, but I’ve always considered the simplest methods to be the best.
Find more gardening tips here
Recent Posts
Green Milkweed is a herbaceous wildflower native to North America[1], and is a host plant for caterpillars of the Monarch Butterfly[2]. Scientifically known as Asclepias viridis, it grows up to...
Keystone Plants - What Are They, And Why Are They Important?
If you've been researching native plants, you may have come across the term "Keystone Plant" or "Keystone Species". Often spoken or reverence or casually noted for their importance. So, what exactly...