Restoring old tools to can be a daunting task, and one that most people don’t want to undertake. However, if we are interested in just using the tool rather than a full restoration, well, then I will show you how long it takes to do a quick restore and get a tool working. This opens up the possibility that we can actually find some serious bargains at garage sales, eBay, or even Facebook Marketplace.
Related ==> Learn how to make your own Scrub Plane here
So, in this short article I will show you the steps I took, and note how long it took to get a recent purchase up to useable condition. The day I got the plane I sent a picture to my friend, who commented “nice”, and then I just started sending pictures as I completed each step. At the end of it all, I could see the timestamps on the pictures, and hence, I know how long it took to take a bargain tool and get it to where it took nice, fine shavings. So, I thought it would be interesting for those who hesitate to purchase an old tools because they think the ‘restoration’ is too much work. Ok, here we go!
Step 1 – unboxing
This is a Stanley 110 Block Plane I picked up on eBay for $11 plus about $7 shipping. From the listing I knew it was covered in rust, but considering these old block planes are very tough, I figured I could clean it up without too much trouble.
This image is timestamped 8:01 pm.

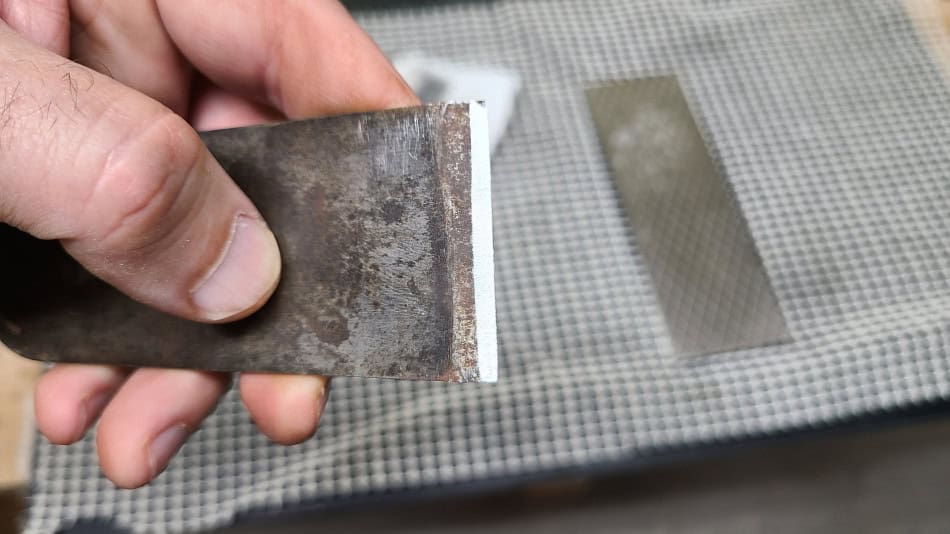
Step 2 – Using a razor blade scraper
The difference between these two images is basically two minutes. I just used a razor blade scraper to remove most of the surface rust. It greatly improves the appearance of the blade, and for the keen eyed it shows the ‘sweetheart’ logo, which dates this one to about 1922….
But these images are timestamped at 8:02 and 8:04 pm

Step 3 – Initial sharpening / rust removal
Spending about 5 minutes on a 300 grit sharpening stone reveals clean steel. I continued this on the 300 grit to just get the main cutting edge cleaned off. This image is timestamped 8:07, so about 3 minutes of sharpening. Overall this step took 11 minutes.
Step 4 – Sole rust removal / flattening
Next. we need to remove the rust from the bottom of the sole. This will not just improve the appearance, but also flatten it. I started this operation at 8:15 and as you can see in the image at right, it goes pretty quick! After 50 seconds I had removed a substantial amount of rust.

Since it is a block plane, it will fit on my sharpening stone. So I can simply rub it on the diamond plate and it will remove the rust and flatten at the same time.
I did this operation for about 5 minutes total. The image at right is timestamped at just before 8:20 pm. Although there is still rust visible, the main area of the sole is flat and clean, particularly around the mouth of the plane.

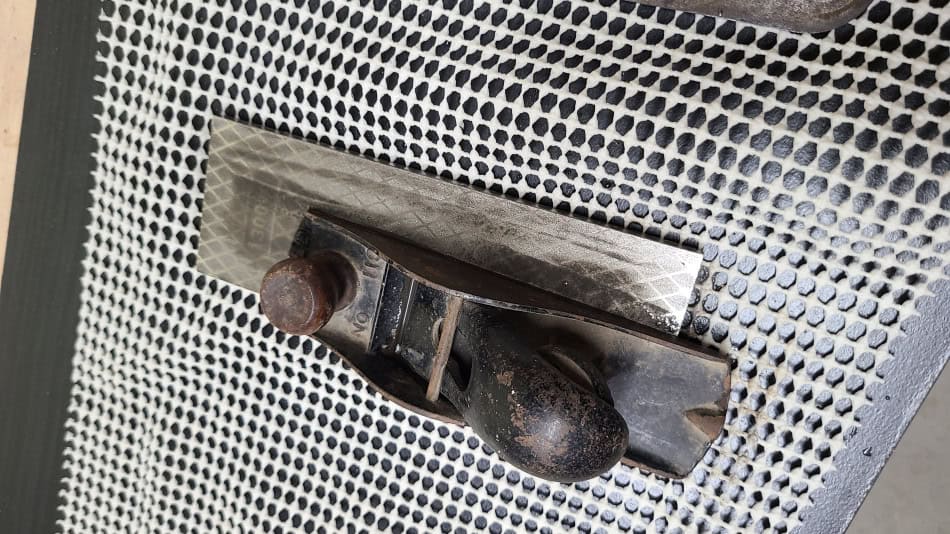
Step 5 – Finish sharpening
Now that I am done with the 300 grit side of my stone, it is time to flip it over and start on the finer 1000 grit side.
The goal here is to polish the cutting face/edge until we can feel a solid bur across the entire back. But, since the 1000 grit produces such a noticeable difference compared to the other, I need to make sure the entire surface is polished. The image at right shows a line on the cutting edge where you can see the progress of the 1000 grit. I continued this until just about all of the surface was polished to 1000 grit, save for the upper left corner. I then took it to a strop for further polishing, giving it 50 strokes. The timestamp of this image was 8:26

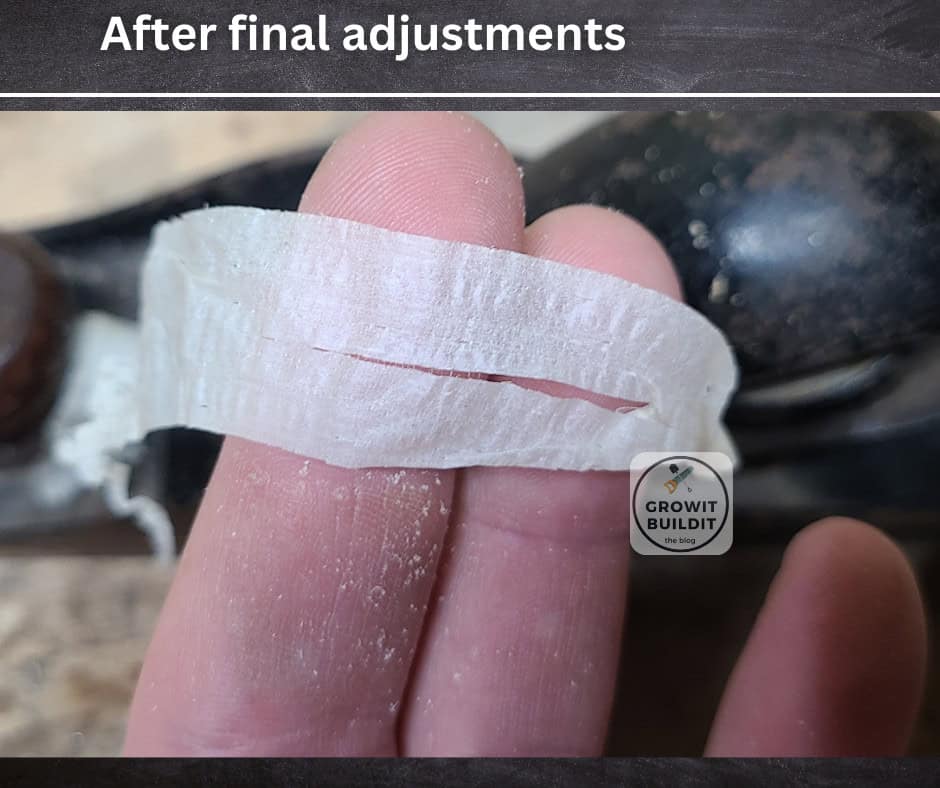
Step 6 – Adjusting / Testing
Satisfied with the level of sharpening ( yes, I shaved some hair off my leg with it) it was now time to try to take a shaving. What you see weaved through my fingers was a clean shaving after some adjustments. The wood is just a scrap of pine, so nothing difficult. But it proves that it works.
The timestamp of this image is 8:33 pm.

Conclusion
The total time to take an old to take a 100+ years old rusty, dull block plane and restore it to not just useable was 32 minutes. Actually, it is a really nice performance. I wasn’t actually racing myself or anything, but just steadily working and sending pictures to a buddy as I made progress. Now, 32 minutes is 32 minutes, but I find that time spent in my little workshop restoring tools to be rewarding, meditative, and an overall pleasurable experience.
The next day I did tinker with the setting a little bit more, and was able tune it to take very wispy, transparent shaving. This is actually the first time I ever owned a block plane that required the use of a hammer to fully adjust, and it was pretty easy to get the hang of it.
If you are unfamiliar with adjusting block planes that have no dials or knobs, then I will briefly explain it. I didn’t invent this method, but was verbally described in this video.
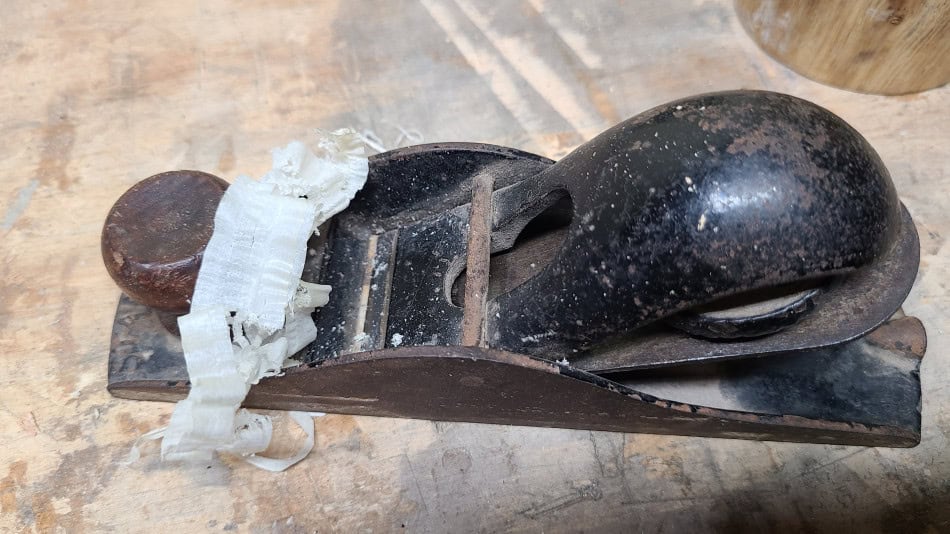
You simply loosen the cap, and adjust the blade how you like it. Now, it may seem like it is a tedious task to adjust the depth of the blade. However, that is where the trick described in the video comes into play. In the above image, you can see the small riser in the rear of the sole. Once you have adjusted the blade, to roughly where you think you would like it, you tighten the cap a bit (but not too much). Then, simply tap the little riser with a hammer. As you tap it with a hammer, the blade is retracted. You simply test on a piece of scrap, and then gently tap to retract the blade. In the end, you get a shaving that is transparent.
More DIY here…
Recent Posts
Green Milkweed is a herbaceous wildflower native to North America[1], and is a host plant for caterpillars of the Monarch Butterfly[2]. Scientifically known as Asclepias viridis, it grows up to...
Keystone Plants - What Are They, And Why Are They Important?
If you've been researching native plants, you may have come across the term "Keystone Plant" or "Keystone Species". Often spoken or reverence or casually noted for their importance. So, what exactly...